 wsrx Installation
wsrx Radiosonde decoder, monitoring, scan and decoder status
With wsrx, you can send radiosonde telemetry to wettersonde.net via API. Radiosondes are automatically detected by the scanner.
The decoders were developed by rs1729, and the open-source code can be found on GitHub
(https://github.com/rs1729/RS). Many thanks to him for his great work.
What this software can do!
- Send data to wettersonde.net via API
- Send data to radiosondy.info or similar sites via APRS.
- Send data via AXUDP to aprsmap or udpgate4
- Use radar to locate radiosondes in the sky
- List of all detected radiosondes
- Detailed information on each radiosonde
- The entire radiosonde frequency range is scanned
- Radiosondes are automatically detected
- Simultaneous decoding of multiple radiosondes
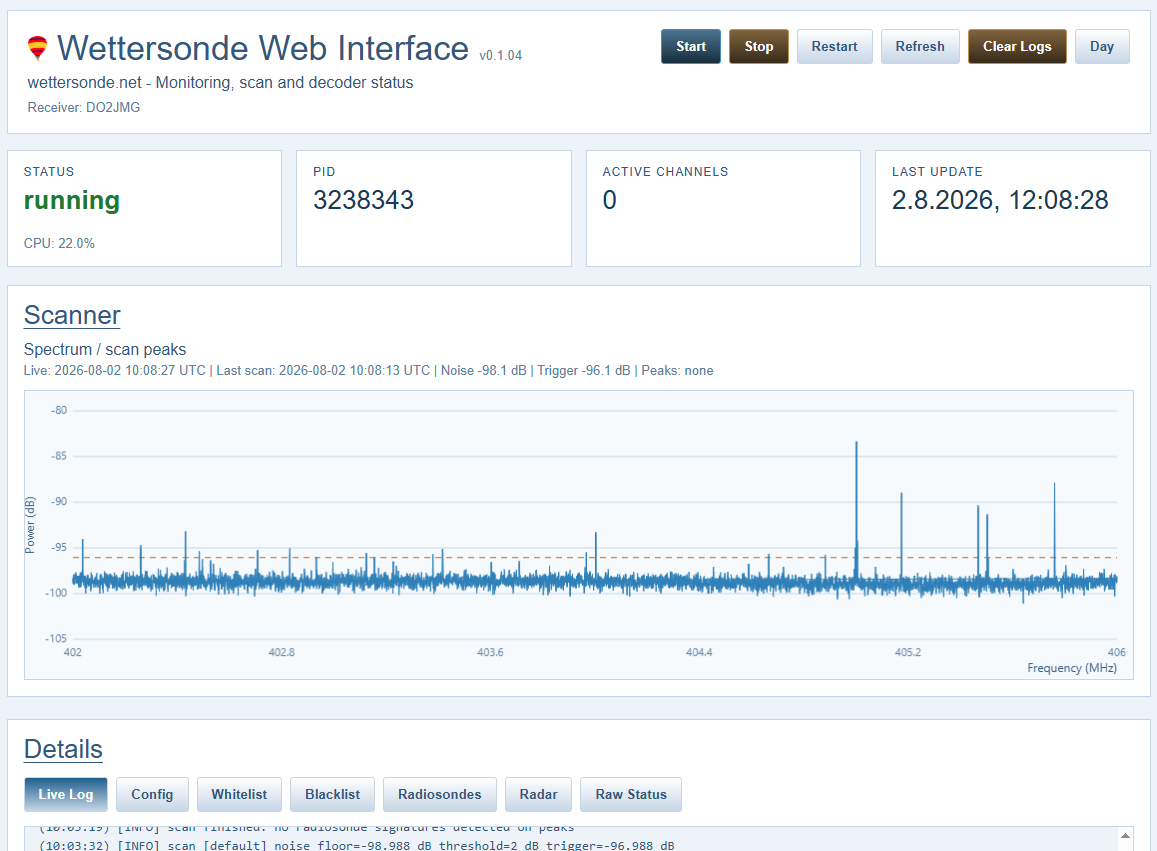
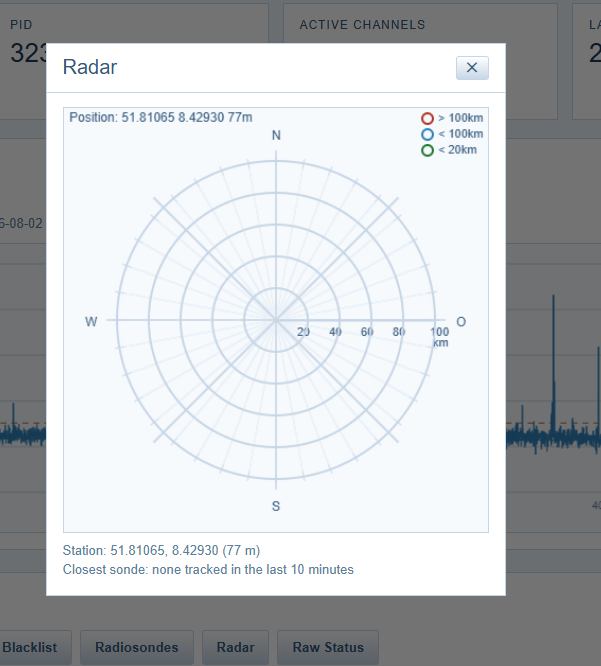
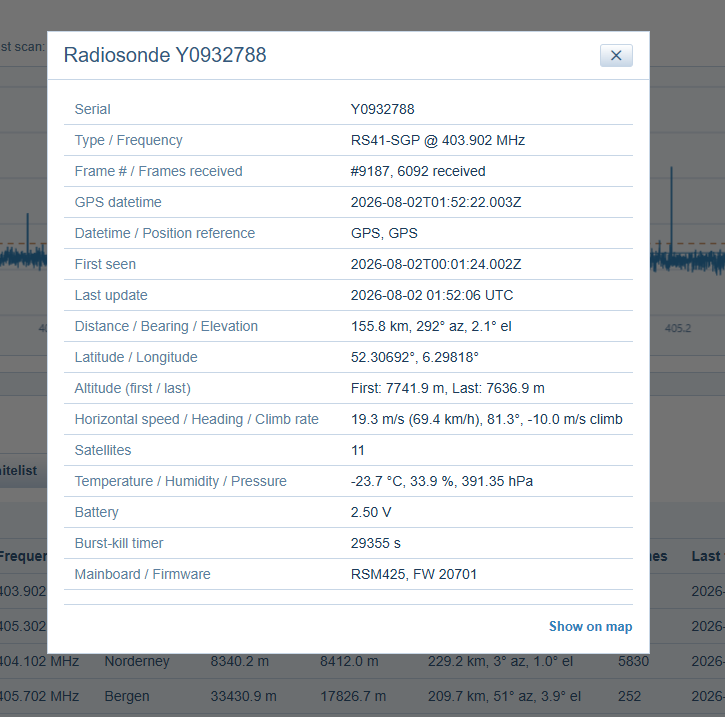
Table of Contents
Hardware required :
- Airspy mini or SDR-Play or RTL-SDR
This guide installs KA9Q Radio, the wsrx radiosonde receiver software and the required decoder programs. wsrx uses KA9Q as SDR backend
and expects all decoder binaries in the decoder subdirectory next to the wsrx application.
Requirements
The installation is intended for Linux systems such as Raspberry Pi OS, Debian or Ubuntu with an Airspy Mini receiver. Run the commands as a user with sudo rights.
sudo apt update
sudo apt install -y avahi-utils build-essential make gcc g++ git wget unzip rsync time \
              libairspy-dev libairspyhf-dev libavahi-client-dev libbsd-dev libfftw3-dev \
              libhackrf-dev libiniparser-dev libncurses5-dev libopus-dev librtlsdr-dev \
              libusb-1.0-0-dev libusb-dev portaudio19-dev libasound2-dev libogg-dev \
              uuid-dev libsamplerate-dev
sudo apt install -y curl
Installing wsrx
cd $home

git clone https://github.com/DO2JMG/wsrx.git

cd ~/wsrx

make clean
make

cd decoder
make clean
make
Configuring wsrx
cd ~/wsrx
nano config.ini
Change your call sign and your coordinates. The call sign does not have to be an amateur radio call sign.
[station]
callsign = NOCALL
lat = 52.123456
lon = 8.123456
alt = 100
Make the executables and start scripts executable:
cd ~/wsrx
chmod +x wsrx.sh
chmod +x update.sh
Starting wsrx and the web interface
Warning
KA9Q must be fully installed before wsrx is started.
Start wsrx manually:
cd ~/wsrx
./wsrx.sh
Stop wsrx manually:
cd ~/wsrx
./wsrx.sh stop
The web interface listens on port 8073 by default. Open it in your browser with the IP address of your receiver, for example:
http://receiver-ip-address:8073/
Update wsrx:
cd ~/wsrx
./update.sh
Automatically delete radiosondes that are older than 24 hours. Add a cronjob.
crontab -e
0 * * * * find /home//wsrx/logs/sondes -name "*.json" -mtime +1 -delete
0 3 * * * truncate -s 0 /home//wsrx/logs/wsrx.log
Installing KA9Q Radio
KA9Q Radio is used as the SDR backend. The example below builds KA9Q from source and installs it system-wide.
cd ~
git clone https://github.com/ka9q/ka9q-radio.git
cd ka9q-radio
git checkout e1224dcd1991637ba8e1caa68cd802e1b22933de
make -j$(nproc)
sudo make install
Add your user to the radio group and log out/in afterwards:
sudo usermod -aG radio $(whoami)
For best performance, create FFTW wisdom for the Airspy Mini. This can take a long time.
cd /etc/fftw
sudo fftwf-wisdom -v -T 1 -o nwisdom rof300000 cob2400 cob1250 cob1202 cob1200
sudo cp -i nwisdom wisdomf
Configuring KA9Q for Airspy Mini
Create a udev rule for Airspy
echo 'SUBSYSTEM=="usb", ATTR{idVendor}=="1d50", ATTR{idProduct}=="60a1", GROUP="radio", MODE="0660"' | sudo tee /etc/udev/rules.d/52-airspy-radio.rules
Create the KA9Q radiod configuration:
sudo nano /etc/radio/radiod@wettersonde_rx.conf
[global]
hardware = airspy
mode = fm
status = wettersonde.local
iface = lo
ttl = 0
data = wettersonde-pcm.local

[airspy]
device = airspy
description = "wettersonde_rx"
frequency = 407m0

[telemetry]
freq = "401m50"

[manual-400]
freq = 0
ttl = 0
Enable and start KA9Q:
sudo systemctl daemon-reload
sudo systemctl enable radiod@wettersonde_rx
sudo systemctl start radiod@wettersonde_rx
Check if KA9Q is running:
systemctl status radiod@wettersonde_rx --no-pager
avahi-browse -art | grep -E "wettersonde|ka9q|pcm"
Optional: systemd service files
The included start scripts already write log files into the wsrx directory. If you want wsrx and the web interface to start automatically after boot, create these systemd services.
sudo nano /etc/systemd/system/wsrx.service
Chance
(username) to your username
[Unit]
Description=wsrx radiosonde receiver
After=network-online.target radiod@wettersonde_rx.service
Wants=network-online.target radiod@wettersonde_rx.service

[Service]
Type=forking
WorkingDirectory=/home/(username)/wsrx
ExecStart=/home/(username)/wsrx/wsrx.sh start
ExecStop=/home/(username)/wsrx/wsrx.sh stop
Restart=always
RestartSec=10

[Install]
WantedBy=multi-user.target
Enable and start both services:
sudo systemctl daemon-reload
sudo systemctl enable wsrx.service
sudo systemctl start wsrx.service
Show logs:
cd ~/wsrx
tail -f logs/wsrx.log
tail -f logs/wsrx-web.log
Optional: APRS Upload
Optionally, you can also use an APRS client to send data to an APRS server. The APRS client is located in the aprs subdirectory.
cd ~/wsrx/aprs
make clean
make
You need to configure your APRS client in the aprs.ini file.
Change your call sign and your coordinates. You'll need to set a passcode for your call sign.
cd ~/wsrx/aprs
nano aprs.ini
Starting and stopping the APRS client
cd ~/wsrx/aprs
./aprs.sh start
./aprs.sh stop
© wettersonde.net - Jean-Michael (DO2JMG) - 2026
 Home
Home Livemap
 Statistics
 Search
  Tools
Tools  Info
Info  About
About